Blog Archives
Homemade Vanilla Extract
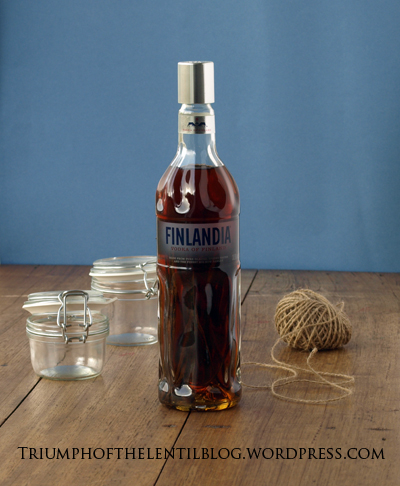
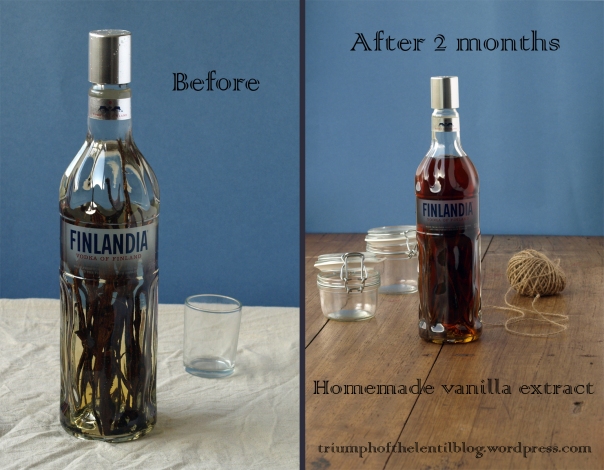
Good quality vanilla extract can be really expensive, and the shop I usually buy it from is often out of stock. But now that I know how easy it is to make at home, I’ll never buy it again. This recipe is so easy, and tastes even better than shop-bought extract.
If you buy organic vanilla beans in bulk (200g (7oz) of them is around 53 beans) it works out to be less than $5 for the vanilla beans, plus the cost of the vodka. Even using good vodka this ends up being half the price of what I used to pay for shop bought extract. (Cheap and nasty vodka will also work in this recipe).
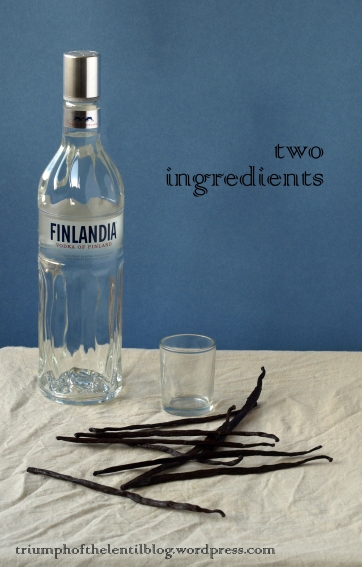
Ingredients:
Around 700ml (23oz) vodka
9 vanilla beans
Method:
Pour a little of the vodka out (around 1 or 2 shots worth), save it for later or drink it.
Slice the vanilla beans lengthways in half. Scraping out some of the pulp and adding this to the vodka will make for a stronger vanilla extract.
Carefully place the vanilla beans and the pulp in the bottle of vodka. Put the lid on and leave it to infuse in a dark cupboard for around two months. To speed up the process turn the bottle upside down, then right side up every so often…this means you can use your extract after a month.
When the vanilla extract is ready either remove the beans and put it into smaller bottles (it makes a nice gift), or simply keep it in the vodka bottle with the vanilla beans.
Preparing for a Vegan Bake Sale, and a Recipe for Vanilla and Almond Crescents

This week there are bake sales happening all around the world as part of the Worldwide Vegan Bake Sale. My local vegan group didn’t have as many people baking as last year and it got me thinking about a stress-free way to make lots of delicious things.
It’s helpful to figure out what keeps for the longest, what can be made at the last minute, what is best made the day beforehand and work out a rough schedule from there.
•Cakes, muffins and cupcakes are best made the day before the sale, it gives them time to cool down, but not so much time that they will lose freshness.
•Many biscuits can be made a few days in advance. The best candidates for these are ones that use plenty of oil and a minimum of water. The Vanilla and Almond Crescents that I created for a baking book (to hopefully be published in 2013 or 2014) are great for this, the recipe is in this post.
•Raw truffles will keep for a while in the fridge, and can also be a good thing to make at the last minute as I did the morning of the bake sale by making a half batch of raw brownies from My New Roots and rolling them in cacao to serve as truffles.
•Dry ingredients can be mixed together hours, days or weeks before baking. This is especially helpful if you’re baking a lot of cakes in one day.
More observations from vegan bake sales:

•There can never be enough chocolate. I found this out at my first stall that with a selection including some of Gunter’s delicious recipes, the chocolate caramel and almond torte pictured above (from Triumph of the Lentil), plain chocolate cake, carrot cake and date cake that the most popular cakes were the ones with chocolate.
•Vegan-friendly cafés and businesses are often happy to donate cakes or ingredients.
•Having ingredients lists on hand for everything is a good idea for people with allergies, and is asked for here when council permits are required.
•Covers for the food are often expected by the council as a condition of the permit. Transparent ones are the best and plastic wrap can serve this purpose if there is nothing else around.
•It’s easy enough to get a bake sale organised, even with a minimum of people. It’s a good fundraiser and an excellent way to expose people to vegan food. Not all places require council permits, and if they are difficult to deal with then it’s easy to get around that by giving food away for free with a donation box at the stall.
And for the vanilla and almond crescent recipe…

These are an incredibly delicious biscuit with just the right amount of sweetness and lots of rich flavours from the almonds and vanilla. My choice of coconut oil for this (and most of my cooking) is the more refined kind, which is refined by filtering it through clay to remove the coconut taste and smell, this gives a ‘buttery’ flavour and texture to the baked good with all the goodness of coconut oil, but without being overwhelmed by coconut flavours.
Soy-Free, Wheat-Free, Gluten-Free Option, under 45 minutes
Kitchen time 15 minutes, baking time 12-15 minutes
Ingredients:
1 cup almonds, ground
3/4 cup unrefined sugar
2 1/3 cups barley flour (or wholemeal spelt, wholewheat pastry or gluten free)
a pinch of salt
3/4 cup coconut oil, melted (or a mixture of melted coconut oil and olive oil)
1/4 cup water
2-3 teaspoons vanilla extract
optional powdered vegan sugar, for coating
Method:
Preheat the oven to 175c (350f). Line or grease two baking sheets.
For best results, grind the almonds and sugar together in a food processor. In a mixing bowl, combine the almonds, sugar, flour and salt. Stir through the coconut oil, water and vanilla extract to form a thick dough.
Take tablespoons of the dough and shape into logs that have thinner ends and a thicker centre. Curl into crescent moon shapes and place on the baking trays.
Bake for 12-15 minutes, until lightly browned. Sprinkle with powdered vegan sugar if you want.
I suspect these will keep in a sealed container for longer than a week, although they never last that long in our house.
* * * * *
On a side note, I’ve created a special Facebook page for this blog. Click ‘like’ on this page if you’d like to be updated on new blog posts, recipes and more.