Blog Archives
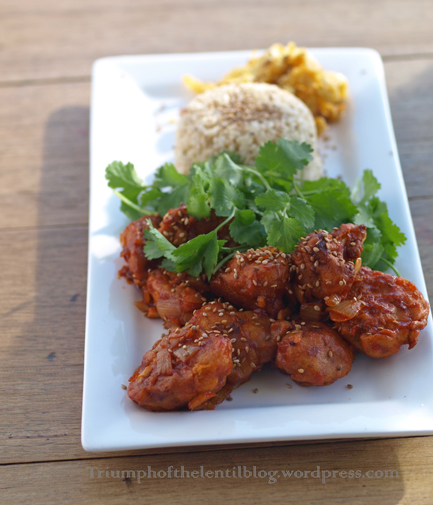
High Protein Gobi Manchurian
Cauliflower (gobi), when fried or baked in batter takes on a different taste and texture, one that makes cauliflower-haters enjoy it. I made this for someone who refers to cauliflower as “broccoli’s evil cousin,” and he liked it a lot.
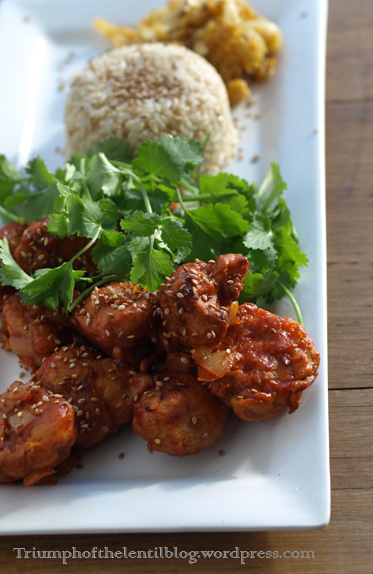
I’ve made other cauliflower dishes with a chickpea flour batter: pakoras from my first book, and the caesar salad with crispy cauliflower and chickpea fritters from High Protein Vegan. The Indo Chinese dish gobi manchurian is something I’ve been wanting to make for a while – it usually consists of cauliflower fried in a flavoured wheat and corn starch batter, with a spicy tomato and chili sauce and I thought it would work brilliantly using chickpea flour instead of the other flours. This makes it gluten-free and high enough in protein to be a satisfying and filling main dish when served alongside some rice or quinoa, and maybe a side salad with plenty of crunchy lettuce.
This recipe has been made soy-free by using coconut aminos and some extra salt where soy sauce would normally be used. Soy-free chickpea or adzuki miso will also work, and if you have no problems with soy, then regular non-gmo soy tamari, shoyu or another kind of naturally fermented soy sauce can also be used.
This is a hearty and savoury dish that can be made really quickly (or the batter can be soaked overnight, for the best nutrition).
Gluten-free, soy-free, nut-free, grain-free, low fat option, under 45 minutes
Serves 2
Ingredients:
For the battered cauliflower:
1 1/2 cups chickpea flour (besan)
3/4 cup water
optional 1 teaspoon lemon juice or apple cider vinegar
1 1/2 teaspoons finely chopped garlic
1 1/2 teaspoons finely chopped ginger
2 teaspoons coconut aminos (or tamari, or naturally fermented soy sauce, or miso)
1 teaspoon finely chopped red chili
1/2 – 1 teaspoon salt (use only 1/2 teaspoon if using tamari, soy sauce or miso instead of coconut aminos)
1 small-medium cauliflower (around 500g)
olive oil, for frying
For the sauce:
optional 2-4 teaspoons sesame seeds
2-3 teaspoons toasted sesame oil or olive oil
1 medium onion, finely chopped
2 teaspoons finely chopped garlic
2 teaspoons finely chopped ginger
1-3 teaspoons finely chopped chili
1/2 cup tomato purée (passata) (to make it yourself, just put some tomatoes in a food processor and process until smooth)
2-3 tablespoons coconut aminos, miso, naturally fermented gmo-free soy sauce or tamari
2 teaspoons coconut sugar, rapadura, sucanat or jaggery
salt, to taste
2 teaspoons tapioca flour or non-gmo corn starch, mixed with 2 tablespoons water
Method:
For the best nutrition, combine the chickpea flour with 3/4 cup lukewarm water and the lemon juice and leave it to sit in a large bowl, covered, at room temperature overnight (it should be a thick batter).
Mix through the garlic, ginger, coconut aminos, chili and salt.
Gently divide the cauliflower into florets. Chop the larger ones in half if you wish. Thoroughly coat these in the batter*
The rest of this recipe comes together really quickly, so measure out and prechop all the sauce ingredients.
In a large dry saucepan, toast the sesame seeds over medium heat, shaking the pan often, until they taste toasted. Remove from the pan and set aside until later.
Put around 1cm (1/2″) olive oil in a large pan. Heat over medium-high heat. To test the heat, add a piece of the coated cauliflower, the oil should fizz up around the cauliflower right away. Fry the cauliflower in batches until golden-brown, flipping the pieces over halfway through frying. It takes 2-3 batches in a 24cm chef pan. Drain the fritters in a colander lined with a tea towel.
Alternatively, for a lower fat option, bake on greased or lined baking sheets in an oven preheated to 180c (350f) for half an hour, flipping the pieces over after 25 minutes.
When all the cauliflower has finished cooking, heat the toasted sesame oil in a large saucepan over a heat between medium-high and high. When the oil is hot, stir through the onion for two minutes, then stir through the ginger and garlic for one minute. Stir through the chili for thirty seconds, then add the tomato purée, coconut aminos and coconut sugar. Stir through until bubbling then taste, and adjust the seasonings with salt and chili (it should be fairly hot, but still edible and tasty). Keep stirring for another minute or two, to allow the sauce to reduce, then quickly stir through the tapioca flour and water mixture. Quickly add the fried cauliflower and stir to coat. Serve right away, sprinkled with toasted sesame seeds.
*if you have extra batter left over, cut an onion into half moons (or use any other chopped, fast cooking vegetable) and coat in the batter, then fry after the cauliflower has finished.
Homemade Vanilla Extract

Good quality vanilla extract can be really expensive, and the shop I usually buy it from is often out of stock. But now that I know how easy it is to make at home, I’ll never buy it again. This recipe is so easy, and tastes even better than shop-bought extract.
If you buy organic vanilla beans in bulk (200g (7oz) of them is around 53 beans) it works out to be less than $5 for the vanilla beans, plus the cost of the vodka. Even using good vodka this ends up being half the price of what I used to pay for shop bought extract. (Cheap and nasty vodka will also work in this recipe).
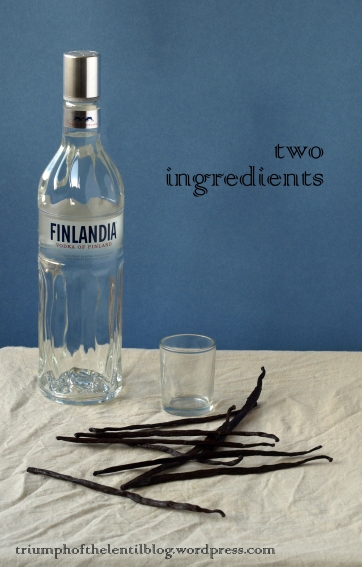
Ingredients:
Around 700ml (23oz) vodka
9 vanilla beans
Method:
Pour a little of the vodka out (around 1 or 2 shots worth), save it for later or drink it.
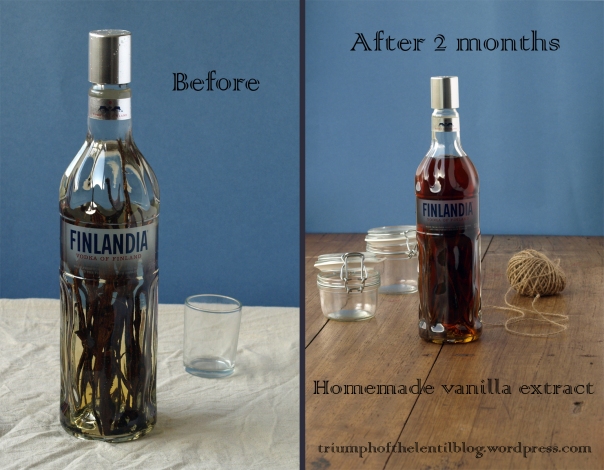
Slice the vanilla beans lengthways in half. Scraping out some of the pulp and adding this to the vodka will make for a stronger vanilla extract.
Carefully place the vanilla beans and the pulp in the bottle of vodka. Put the lid on and leave it to infuse in a dark cupboard for around two months. To speed up the process turn the bottle upside down, then right side up every so often…this means you can use your extract after a month.
When the vanilla extract is ready either remove the beans and put it into smaller bottles (it makes a nice gift), or simply keep it in the vodka bottle with the vanilla beans.
Zucchini and Tomato Chutney

Most people that grow zucchinis in Tasmania seem to think the plants produce too much – I can never have enough of them – whether it’s grating them up and sneaking them into delicious chocolate mud cake, adding them to roast veggies for the last 10 minutes of roasting, grating and mixing them into a chickpea flour batter and frying as fritters, there are so many uses for them. Here is another way to use this vegetable, in a chutney that will probably keep for 12 months in the cupboard. It’s a small batch so if you’ve never made your own chutney before this is a nice one to try.
I’m growing costata romanesco zucchini this season (I think this is the third year in a row that I’ve grown it), it’s a really tasty Italian heirloom variety – so it’s GMO-free and easy to save the seeds.
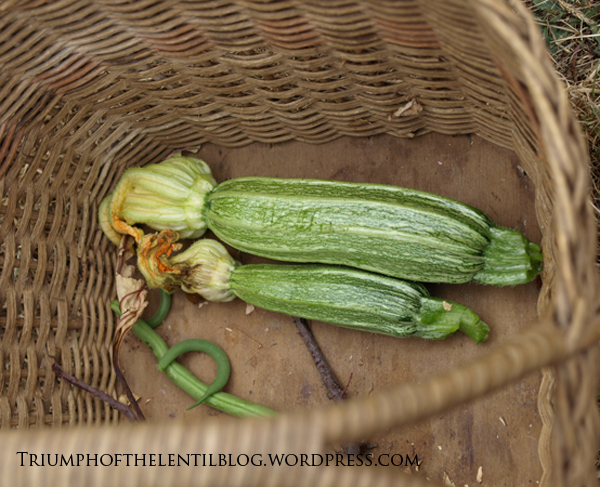
costata romanesco zucchini
Making your own chutneys and sauces is actually really easy and affordable. With shop-bought organic chutneys and relishes often being ridiculously expensive with weird stuff like xanthan gum and anonymous ‘natural flavour’ added to them it can be worthwhile to make your own, even if you don’t grow any veggies.
I based this recipe with the same amounts of fruit, sugar and vinegar as a pumpkin chutney recipe from Good Home Preserving. With the right jar preparation the pumpkin chutney recipe keeps for 12 months, so I imagine that this one will keep well too. The trick is to sterilise your jars with heat before filling, and to tip them upside down after filling until they cool down. I use this same trick for jams and sauces.
The flavourings I use in this recipe are reminiscent of a typical English chutney or relish. Feel free to change the spices, as long as the main ingredients are the same this recipe will work.
Gluten-free, soy-free, low fat, sugar-free option
Kitchen time 10-15 minutes. Cooking time 1 hour.
Makes around 1100ml/1.1 quart/4 2/3 cups)
Ingredients:
300g (10.58oz) rapadura, sucanat, coconut sugar or raw sugar
300g (10.58oz) apple cider vinegar
700g (1.54lb) zucchini, diced
1 small carrot (or extra zucchini), diced (50-100g/1.76-3.2oz)
200g (7.05oz) diced tomatoes, or tomato purée/crushed tomatoes
50g (1.76oz) sultanas or raisins
1 clove of garlic, finely chopped
125g (4.4oz) onions, diced
1 1/2 teaspoons yellow mustard powder (or yellow mustard seeds, crushed in a pestle and mortar)
1/4 teaspoon ground black pepper
1/2 teaspoon ground ginger
1/2 teaspoon turmeric
1 heaped teaspoon Himalayan salt, or natural sea salt
3 cloves, ground (or 1/4 teaspoon ground cloves)
Method:
Rinse enough jars out with very hot water (preferably boiling). Place upside down, directly on the racks of a cold oven. Heat the oven up to 120c (250f).
Combine all the ingredients in a large saucepan or stockpot over medium-low heat. Stir every now and then until the sugar is dissolved. Bring to the boil, then reduce the heat and simmer, with the lid off, for around an hour.
When the chutney has finished cooking, bring a small pot of water to the boil. Add the pot lids or gaskets and boil for 30-60 seconds, carefully remove the lids and place upside down on a clean tea towel to dry.
Carefully remove the hot jars from the oven. Fill them up with the hot chutney (I place a wide-mouthed funnel over the jars and use a soup ladle to add the chutney). Screw the jar lids on tightly and turn upside down until thoroughly cold. Turn the right way up and store in a cupboard, it will probably keep for 12 months. It will taste best after it’s been in the cupboard for a couple of weeks, but it’s still good to enjoy right away. Once the jars are opened, keep them in the fridge.
Great served with mildly flavoured seitan sausages such as pumpkin seed, lentil and herb from High Protein Vegan, or burgers such as chickpea schnitzel patties or bean and sunflower seed rissoles from ‘High Protein Vegan’, or the lentil burgers from Triumph of the Lentil.

chickpea schnitzel patties from High Protein Vegan
P.S. I have more recipes coming up on this blog soon. To ensure that you get to see them subscribe to the mailing list on the right hand side of this page to get blog posts by email – I don’t send spam, just blog posts which are not that frequent and always have a recipe or something useful in them. Facebook is making it really difficult for blog pages to get news out to people that like the page, so even if you ‘like’ the Triumph of the Lentil Blog page, you may not find out about new posts unless you follow this blog by email or Twitter.
This post is a part of Wellness Weekend, Pennywise Platter, Wheat-Free Wednesday, Made from Scratch Monday, Waste Not Want Not Wednesday,
Soy-Free Tofu
When I’m working on books I never really know what recipes to share on the blog, and what can wait for the book. This is something I knew I had to share right away.

It’s not the same as soy tofu – it doesn’t have the same texture or taste, but it is a protein-rich medium for all kinds of delicious sauces (like chermoula, pictured above), or to be fried up and used in a variety of recipes, like the grain-free pad thai from my next book, pictured below.

It can also be cut into chip shapes, shallow fried and enjoyed as a high-protein alternative to potato chips, to turn a chip sandwich into a balanced meal.

I’ve based my recipe around a combination of things – Burmese tofu has been traditionally made with chickpea flour for a long time, but typically involves a lot of prep time and tricky steps, and while this would reduce the phytic acid in the tofu, it makes the process a lot slower. With my recipe the tofu can be ready to use in under 45 minutes. If you’re good with planning ahead and want to make the tofu as nutritious as possible then the batter can definitely be soaked for 8 hours or more before heating it up, otherwise enjoy this cheap, fast and tasty homemade alternative to tofu.
Soy-free, gluten-free, nut-free, low fat, nightshade-free, onion- and garlic-free, under 45 minutes
Makes 4-6 serves
Ingredients:
2 1/2 cups chickpea flour (besan)
1 teaspoon salt
4 cups cold water
Method:
Line or grease a 20x30cm (8×12″) pan.
In a heavy-bottomed chef’s pan, frying pan or saucepan place the chickpea flour and salt, and squash out any lumps. Add water a little at a time, making sure that no lumps form.
Turn on the heat to medium and stir continuously until very thick. I make this on an electric stove in a 9 1/2″ (24cm) chef’s pan and it takes around 7 minutes. If you’re using a gas stove it will be quicker, if you’re using a smaller saucepan it will take longer.
As soon as the mixture is very thick, quickly spread it into the prepared pan, pressing to form a flat, even surface (it will set very quickly). Leave to set for at least half an hour before using as tofu.
To remove from the pan first slice into whatever shape you want them to be, and gently lift up. I find that lining the pan with a silicon baking mat or some baking paper makes it a lot easier to remove.
This will keep in the fridge for up to a week and can be used in all kinds of recipes that call for tofu.

Satay Soy-Free Tofu
This post has been shared on Pennywise Platter, Wellness Weekend, Whole Food FridaysandHealthy Vegan Fridays
One year of Triumph of the Lentil, a giveaway, and soy-free vegan omelettes
It’s been nearly a year since my first book was released. At the time I had no idea if anyone would want to buy it and cook from it but it’s been great having good feedback on it and knowing people are cooking and appreciating my recipes.
When I started putting Triumph of the Lentil together there were no soy-free vegan cookbooks around. As more people develop sensitivities to this often-used legume it’s been important to me to have something out there that says “yes you can be vegan and enjoy all this delicious food without using soy”. My next book will continue this, with every recipe having a soy-free option, and plenty of recipes suitable for other allergies and diets.
I’d like to give away a copy of Triumph of the Lentil to a lucky reader. To enter the competition, ‘like’ the Triumph of the Lentil Blog facebook page or follow me on twitter, or sign up to the mailing list on the right hand side of this page. Leave a comment on this post with an email address I can contact you on. On the 15th of June the winner will be selected from the comments at random and contacted.
Edit: The winner has now been selected and contacted. Thank you to all those who entered.

To everyone that has already signed up to my facebook, twitter or mailing list – you are welcome to enter the competition, just leave a comment on this post. Your support has been greatly appreciated.
Thank you to everyone that has enjoyed the book and blog over the past year, I hope that you will all like my next one even more.
And now for a recipe:

Soy-Free Vegan Omelettes
These are a very quick and easy dish to make. In the photo the omelette is stuffed with kale, tomatoes and homemade cashew cheese, but all kinds of toppings are great on these omelettes, we often eat them with pickled gherkin slices and kale. For a filling meal serve with cooked grains, bread, chips or roasted vegetables.
Soy-Free, Gluten-Free, Nut-Free, Nightshade-Free, Onion- and Garlic-Free, Low Fat, Under 45 Minutes
Total time: 20 Minutes. Serves 2.
Ingredients:
1 cup chickpea flour (besan)
3 tablespoons nutritional yeast (savoury yeast flakes)
1/2-1 teaspoon salt
1 teaspoon cracked pepper
1 cup water
Method:
Combine the chickpea flour, nutritional yeast, salt and pepper in a mixing bowl, breaking up any lumps. Add the water a little at a time, mixing to form a batter.
Thoroughly brush or spray a frying pan with olive oil and heat on a medium-high setting. When the pan is hot, pour in half the batter (if it is thicker in the centre and thinner on the outsides you can use the back of a metal spoon to gently spread the batter out).
Cook without disturbing until the edges are cooked through and there are bubbles in the middle. Gently flip over and cook for a further minute or two, until the other side is completely cooked. Place on a plate, keeping it warm in the oven if you wish.
When the first omelette is out of the pan, quickly pour the other half of the batter in and cook in the same way.
Put toppings on one half of each circle and flip the other side over the top.
This post has been a part of Allergy-Free Wednesdays.
Oat and Cinnamon Biscuits
I recently became aware that in the ebook edition of Triumph of the Lentil, the ingredients list for the oat and cinnamon biscuit recipe was missing. I’ve since fixed that up (and have double-checked all the other recipes), but thought I should also share it on here.
Some of my American readers might be a bit confused about what an Aussie ‘biscuit’ is. Many people here in Australia are even starting to call them ‘cookies’ from the influence of American media, but I will continue to call them by their English and Australian name – biscuits!

This is a healthy and delicious biscuit. Flaxseed meal (or chia seeds) and boiling water work really well in this, in place of the chickpea flour and water. Use 1 heaped tablespoon of flaxseed meal or chia seeds with 1/4 cup of boiling water and leave to sit for a couple of minutes, to replace the chickpea flour and water.
Kitchen time 10 minutes. Baking time 8-12 minutes
Soy-free, low fat, under 45 minutes
Makes 15
Ingredients
3/4 cup rolled oats
3/4 cup flour (barley, wholemeal spelt or wholewheat pastry)
1/4 cup chickpea flour (besan)
1/3 cup raw sugar or rapadura
a pinch of salt
3/4 teaspoon cinnamon
1/2 teaspoon bicarb soda
1/3 cup sultanas (raisins) or vegan chocolate chips, optional
1/4 cup grated apple (1 very small one) or apple sauce (or use extra oil instead if you don’t have either of these)
1/4 cup water
2 tablespoons oil (melted coconut, olive or sunflower)
1 teaspoon vanilla extract
1 teaspoon barley malt syrup (optional)
Method
Preheat the oven to 160-200c (320-390f).
In a mixing bowl, combine the dry ingredients. Add the wet ingredients and stir until evenly mixed. Place heaped teaspoons of the mixture on a greased or lined baking tray, flatten with a wet fork, and bake for 8-12 minutes, until the bottoms are brown.