Blog Archives
Zucchini and Tomato Chutney

Most people that grow zucchinis in Tasmania seem to think the plants produce too much – I can never have enough of them – whether it’s grating them up and sneaking them into delicious chocolate mud cake, adding them to roast veggies for the last 10 minutes of roasting, grating and mixing them into a chickpea flour batter and frying as fritters, there are so many uses for them. Here is another way to use this vegetable, in a chutney that will probably keep for 12 months in the cupboard. It’s a small batch so if you’ve never made your own chutney before this is a nice one to try.
I’m growing costata romanesco zucchini this season (I think this is the third year in a row that I’ve grown it), it’s a really tasty Italian heirloom variety – so it’s GMO-free and easy to save the seeds.
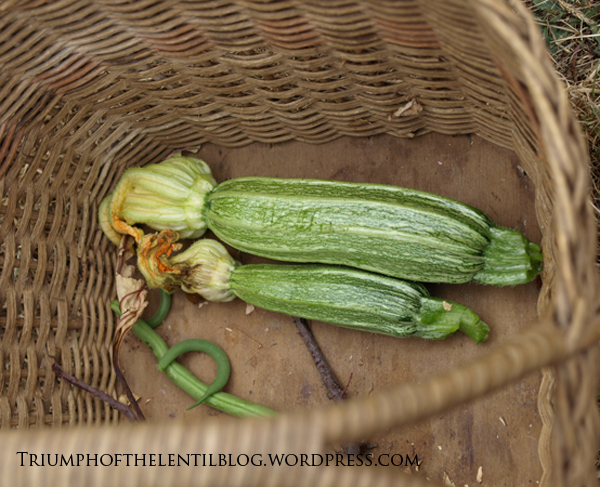
costata romanesco zucchini
Making your own chutneys and sauces is actually really easy and affordable. With shop-bought organic chutneys and relishes often being ridiculously expensive with weird stuff like xanthan gum and anonymous ‘natural flavour’ added to them it can be worthwhile to make your own, even if you don’t grow any veggies.
I based this recipe with the same amounts of fruit, sugar and vinegar as a pumpkin chutney recipe from Good Home Preserving. With the right jar preparation the pumpkin chutney recipe keeps for 12 months, so I imagine that this one will keep well too. The trick is to sterilise your jars with heat before filling, and to tip them upside down after filling until they cool down. I use this same trick for jams and sauces.
The flavourings I use in this recipe are reminiscent of a typical English chutney or relish. Feel free to change the spices, as long as the main ingredients are the same this recipe will work.
Gluten-free, soy-free, low fat, sugar-free option
Kitchen time 10-15 minutes. Cooking time 1 hour.
Makes around 1100ml/1.1 quart/4 2/3 cups)
Ingredients:
300g (10.58oz) rapadura, sucanat, coconut sugar or raw sugar
300g (10.58oz) apple cider vinegar
700g (1.54lb) zucchini, diced
1 small carrot (or extra zucchini), diced (50-100g/1.76-3.2oz)
200g (7.05oz) diced tomatoes, or tomato purée/crushed tomatoes
50g (1.76oz) sultanas or raisins
1 clove of garlic, finely chopped
125g (4.4oz) onions, diced
1 1/2 teaspoons yellow mustard powder (or yellow mustard seeds, crushed in a pestle and mortar)
1/4 teaspoon ground black pepper
1/2 teaspoon ground ginger
1/2 teaspoon turmeric
1 heaped teaspoon Himalayan salt, or natural sea salt
3 cloves, ground (or 1/4 teaspoon ground cloves)
Method:
Rinse enough jars out with very hot water (preferably boiling). Place upside down, directly on the racks of a cold oven. Heat the oven up to 120c (250f).
Combine all the ingredients in a large saucepan or stockpot over medium-low heat. Stir every now and then until the sugar is dissolved. Bring to the boil, then reduce the heat and simmer, with the lid off, for around an hour.
When the chutney has finished cooking, bring a small pot of water to the boil. Add the pot lids or gaskets and boil for 30-60 seconds, carefully remove the lids and place upside down on a clean tea towel to dry.
Carefully remove the hot jars from the oven. Fill them up with the hot chutney (I place a wide-mouthed funnel over the jars and use a soup ladle to add the chutney). Screw the jar lids on tightly and turn upside down until thoroughly cold. Turn the right way up and store in a cupboard, it will probably keep for 12 months. It will taste best after it’s been in the cupboard for a couple of weeks, but it’s still good to enjoy right away. Once the jars are opened, keep them in the fridge.
Great served with mildly flavoured seitan sausages such as pumpkin seed, lentil and herb from High Protein Vegan, or burgers such as chickpea schnitzel patties or bean and sunflower seed rissoles from ‘High Protein Vegan’, or the lentil burgers from Triumph of the Lentil.

chickpea schnitzel patties from High Protein Vegan
P.S. I have more recipes coming up on this blog soon. To ensure that you get to see them subscribe to the mailing list on the right hand side of this page to get blog posts by email – I don’t send spam, just blog posts which are not that frequent and always have a recipe or something useful in them. Facebook is making it really difficult for blog pages to get news out to people that like the page, so even if you ‘like’ the Triumph of the Lentil Blog page, you may not find out about new posts unless you follow this blog by email or Twitter.
This post is a part of Wellness Weekend, Pennywise Platter, Wheat-Free Wednesday, Made from Scratch Monday, Waste Not Want Not Wednesday,
Nacho Salad
I like to eat salads for meals every now and again, typically if they have plenty of protein, fat and some carbs to make it more filling. This is a salad which has all of these things, but according to my other half it shouldn’t be called a salad, just ‘nachos’. Whatever it’s called, this is a satisfying meal that’s fast and easy to make, and perfect for hot weather.
Total time 10-15 minutes
Gluten-Free, Soy-Free, Nightshade-Free, Onion- and Garlic-Free Option, Under 45 Minutes
Serves as many as you want
Ingredients:
Dressing of your choice (for 2 adults and 2 children I use 3 tablespoons olive oil, 1 tablespoon apple cider vinegar, 1/2 tablespoon raw agave syrup, 1/2 tablespoon seeded or dijon mustard)
Leafy greens (eg. lettuce, rocket (arugula), miners lettuce, mizuna, mustard greens)
Heartier raw vegetables (eg. cabbage, kale, grated carrot, sugar snap peas, green beans)
Optional fresh herbs such as oregano and coriander leaves (cilantro)
Corn chips, or extra grated carrot
Cooked or sprouted beans
Optional extras such as avocado, vegan cheese, salsa, spring onion (green onion)
Method:
Mix the dressing in a large mixing bowl. Add the greens, veggies and herbs and toss to thoroughly coat. Put layers of the dressed salad, corn chips, beans and any extras on large plates and serve right away.
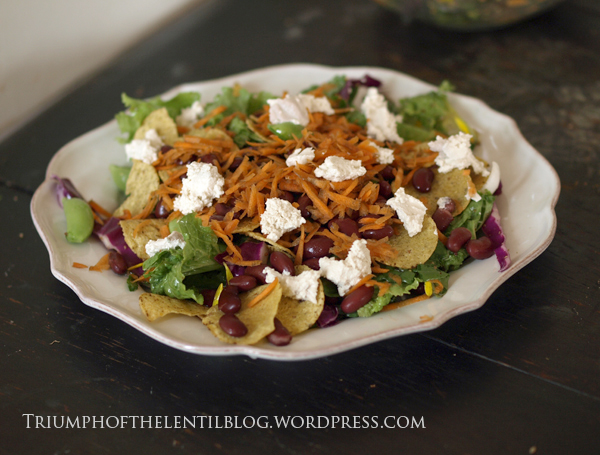
In the photo I’ve used lettuce, rocket (arugula), sugar snap peas, red cabbage, grated carrot, corn chips, cooked red kidney beans, and the basic cashew cheese from ‘Artisan Vegan Cheese’.
Chickpea and Gherkin Smørrebrød
I said I would post another recipe for using homemade vegan mayonnaise soon and here it is. After formatting the Triumph of the Lentil Kindle edition, cooking celebration meals, and editing my wilderness photos for sale as calendars, cards and prints, I now have a moment to post about smørrebrød.

Smørrebrød is a Danish open-faced sandwich, and is perfect for using slices of hearty wholegrain breads that aren’t so great for using in a two-slice sandwich. In Denmark it’s traditionally made from a dark rye sourdough, but I use my 100% wholemeal wheat bread with great results. Traditionally butter is spread on the bread (that’s what ‘smørre’ means), but I’ve used homemade vegan mayonnaise on mine.
There are heaps of different traditional toppings which are definitely not vegan, and although I never ate the ‘real’ thing in Denmark, I think these ones I’ve made topped with salad greens, chickpea salad and pickled gherkin slices resemble them.
Kitchen time 5-10 minutes. Serves 2.
Soy-free, onion- and garlic-free, nightshade-free, no speciality ingredients
Ingredients:
4-6 slices fresh wholemeal bread (preferably rye, or my wholemeal wheat bread recipe)
homemade vegan mayonnaise
salad greens
1 1/2 cups cooked chickpeas (1 400g (14oz) tin, rinsed and drained) (use 2 1/4 cups if you’re extra hungry)
pickled gherkin slices
Method:
Spread some vegan mayonnaise on the bread. Mix the salad greens with some more vegan mayo and place this on top of the bread. Using a fork, mash the chickpeas with plenty of vegan mayonnaise and cover the salad greens with this. Top with gherkin slices and serve right away.