Blog Archives
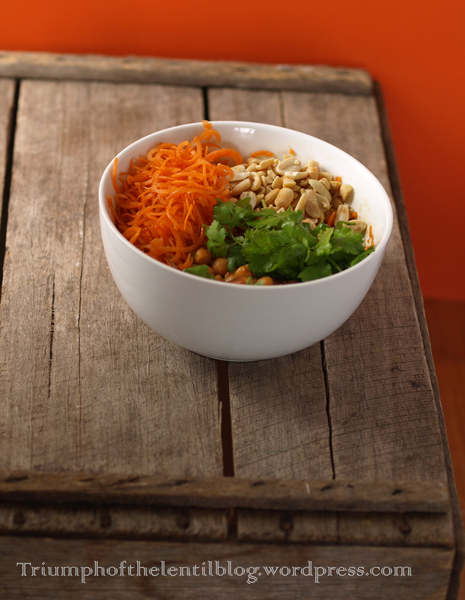
Spiralised Carrot and Chickpea Pad Thai, plus a spiraliser review
 My second book (High Protein Vegan) already has a recipe for a grain-free pad Thai, but seeing as I didn’t have any cabbage on hand, didn’t have the time to make a batch of soy-free tofu and I now have a magical veggie pasta maker, I thought I would try making a different version.
This new recipe is just as delicious as the original recipe, I don’t even miss the crispy bits of fried soy-free tofu. The raw carrot noodles add a nice crunch to the dish and go really well with the sweet, sour and spicy pad Thai sauce.
If you cook for people that prefer to eat wheat noodles instead of spiralised veggies this recipe can still be made without fuss – first bring some water for their pasta to the boil, prepare all the ingredients while waiting for the water to boil and cooking the pasta (I use wholemeal wheat spaghetti, it takes 9 minutes), then when the pasta is cooked, sauté the onions and heat up the chickpeas and sauce.
Put layers of pasta with half the chickpea/sauce mix in one bowl and roughly mix together, do the same thing with the spiralised carrot and the rest of the chickpea mixture. Top the bowls with peanuts and coriander (add some mung bean sprouts if you have those on hand too) and enjoy.
Serves 2
soy-free*, gluten-free*, sugar-free**, grain-free*, under 45 minutes
Ingredients:
For the sauce:
•zest of half a lime or lemon
•juice of 1 1/2 limes or lemons
•2 tablespoons coconut sugar, or unrefined cane sugar such as rapadura or sucanat
•1 tablespoon coconut aminos, miso, tamari or naturally fermented non-GMO soy sauce
•2 tablespoons water
•1/2 a large fresh chilli, finely chopped (or 2 teaspoons minced chili from a jar, or cayenne pepper, to taste)
•optional (but highly recommended if you’re using lemon instead of lime) 1 teaspoon tamarind purée (tamarind pulp/tamarind concentrate)
•optional pinch or two of salt, to taste (recommended if using coconut aminos)
•4-5 spring onions (green onions), finely chopped
•1 1/2 cups cooked chickpeas
•4 medium carrots per serve (400g/14oz) (or use less if you’re not as hungry than I am – most recommendations for the amount of spiralised veggies per serve are 1 or 2 carrots or zucchinis, which I find is not filling enough)
or 100-150g (3.5-5.3oz) dry wholemeal noodles such as spaghetti per serve
•1/3 cup chopped peanuts
•optional handful or two of finely chopped coriander leaves (cilantro)
•optional 1 cup mung bean sprouts
Method:
If you’re boiling pasta for someone, start boiling the water first, and prepare the ingredients while it boils and then cooks the pasta.
Combine all the sauce ingredients in a bowl, set aside until needed.
Heat some olive or sesame oil in a frying pan over medium-high heat. When the oil is hot, add the spring onions and sauté until fragrant, a couple of minutes. Add the chickpeas and the pad Thai sauce and bring to the boil, stirring often, until the sugar has dissolved and the chickpeas are hot.
Put layers of spiralised carrots (or cooked noodles) in bowls, top with a layer of the chickpea mixture and roughly stir to combine, repeat until all the noodles and chickpea mix have been used. Top with the peanuts and coriander leaves and enjoy.
*this depends on your choice out of coconut aminos, miso, tamari or soy-sauce.
**For sugar-free option use coconut sugar.
And now for the spiraliser review:
I’ve been wanting to make raw pasta for years but never got around to it until recently because there are so many spiralisers around now and I wasn’t sure what one to get. Reading other people’s reviews of spiralisers isn’t much help because most people have only tried out one of them and are inclined to say that it works for them so must be the greatest spiraliser around. After doing some research about which ones are available in Australia, I chose the Benriner vertical slicer from Kitchenware Direct.
This spiraliser is the same one that is known as the ‘Cook Help’ in other countries. It’s made in Japan, it feels really sturdy and as though it’s made to last. It is simple to use, I didn’t even need the amusing instructions. It comes with 3 different blades for different sized spiralising (the middle one is my favourite for most veggie pastas), and it only takes around 30 seconds to change the blade, and not much longer to clean it. The time it takes to spiralise enough veggies for a meal for 2 is less than it takes to boil spaghetti.
As you can tell from the recipe above, I’m not restricted to the most well known raw pasta of spiralised zucchini (which is only in season here for around 3 months of the year), but have found that carrot can get really good results in some recipes. Beetroot can be spiralised and made into a delicious salad with a balsamic and olive oil dressing – topping this with some cooked lentils and cultured nut cheeze makes for an easy protein-rich meal.
Since getting this spiraliser I’ve been eating even more vegetables than usual and enjoying some raw pasta meals. A few times I’ve spiralised some daikon radish and carrot used that in place of the kelp noodles from the almond sesame noodle recipe from Practically Raw, I also added some peas for extra protein, even without the capsicum in the original recipe this was great, the sauce has so much flavour.
One concern I had about spiralisers is the amount of waste. Some of the horizontal spiralisers leave a core in the vegetable that can’t be spiralised, so if you only have small vegetables it can waste quite a lot of them Watching this video had convinced me that the Benriner vertical spiraliser was the one to get.
Another thing I like about this spiraliser is that it doesn’t take up much bench space or cupboard space. I also like the green colour, which means it doesn’t stain from spiralising carrots like I imagine some of the white spiralisers might.
When I got this I had no idea I would be using it so much – pretty much every day I have been making a veggie pasta meal, side salad or garnish with the spiraliser. I’ll post the link again, if you’re in Australia and want to buy one: here. I’ve ordered from this shop several times and the orders always arrive quickly and in good condition.
Spanish Chard with Beans, Raisins, Sunflower Seeds and Garlic, plus a cookbook giveaway
Have you ever found a recipe for silverbeet/Swiss chard that you just want to constantly cook? My dolmathes recipe from High Protein Vegan is one of those, but as much as I like it, it takes too much hands-on time for me to want to make it frequently these days. The recipe I’m sharing today (also from my second book), takes minimal time and effort, and people that don’t usually appreciate leafy green veggies enjoy this one.
Silverbeet/Swiss chard is really easy to grow in the garden – I didn’t appreciate it much until I started growing it because it seems a lot more dependable where I live (compared to kale which gets eaten by aphids here). In colder climates chard dies in the winter, but here it grows right through winter, and bursts into leaf in spring, providing a lot of leafy greens for very little effort.

Giveaway time:
Before I share the recipe I would like to offer a copy of High Protein Vegan as a giveaway prize – in celebration of it being released one year ago. This is the first ever cookbook to focus on high protein vegan recipes and it’s had some great reviews so far.
To participate in the giveaway, sign up on the right hand side of this blog for the Triumph of the Lentil blog mailing list, ‘like’ my Facebook page or follow me on Twitter and leave a comment on this post – then on the 1st of December I’ll use a random number generator to pick a comment. If you’ve already signed up to follow this blog by email, facebook or twitter you’re also welcome to enter the giveaway.
The giveaway is now closed. The winning comment is:

About the recipe:
This is an incredibly tasty way to eat a lot of greens in one meal with a little sweetness from the raisins, crunch from the chard stems and umami flavours from the smoked paprika and miso.
I like to serve this with brown rice or other cooked wholegrains (use quinoa for a really fast meal) but bread or roasted veggies are also good choices.
Gluten-Free Option*, Soy-Free Option*, Grain-Free Option**, Nightshade-Free Option, Nut-Free, Under 45 MInutes
Serves 2
Ingredients:
1/2 cup water, for soaking raisins
4 tablespoons raisins or sultanas
4 tablespoons sunflower seeds
1 bunch swiss chard or silverbeet (around 500g/1.1lb)
1-2 tablespoons olive oil
3 large cloves of garlic, thinly sliced
1 1/2 cups cooked azduki, borlotti or pinto beans
1-2 teaspoons miso, tamari or coconut aminos
optional salt, to taste
optional smoked paprika, to taste
Method:
Bring the water to the boil, take off the heat and soak the raisins in it while you prepare the rest of the dish.
Toast the sunflower seeds in a dry frying pan over medium heat, stirring frequently until golden. Set aside.
Cut the chard, including the stalks into one inch (2.5cm) pieces.
Heat the olive oil in a frying pan and sauté the garlic until golden. Add the chard and sauté for one minute. Stir through the beans until the chard is wilted and the beans are hot. Drain the raisins and add these, along with the sunflower seeds. Adjust the seasonings with miso and smoked paprika. Serve right away.
*be sure to choose a soy-free and/or gluten-free miso, or use coconut aminos instead
**use coconut aminos instead of miso
This post is a part of Wellness Weekend, Pennywise Platter, Healthy Vegan Fridays and Waste Not Want Not Wednesday
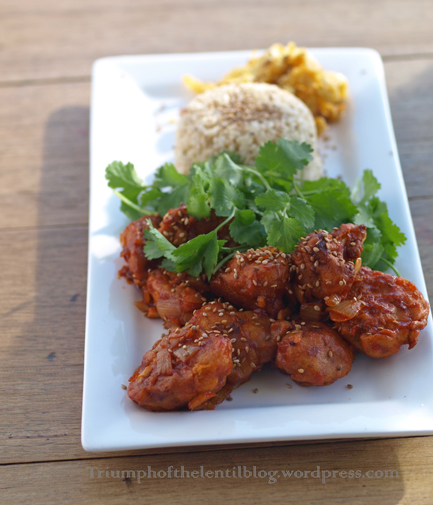
High Protein Gobi Manchurian
Cauliflower (gobi), when fried or baked in batter takes on a different taste and texture, one that makes cauliflower-haters enjoy it. I made this for someone who refers to cauliflower as “broccoli’s evil cousin,” and he liked it a lot.
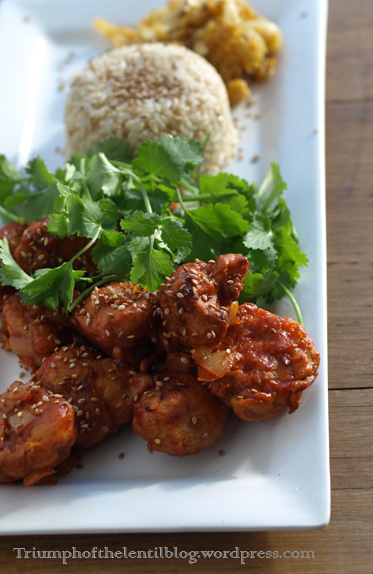
I’ve made other cauliflower dishes with a chickpea flour batter: pakoras from my first book, and the caesar salad with crispy cauliflower and chickpea fritters from High Protein Vegan. The Indo Chinese dish gobi manchurian is something I’ve been wanting to make for a while – it usually consists of cauliflower fried in a flavoured wheat and corn starch batter, with a spicy tomato and chili sauce and I thought it would work brilliantly using chickpea flour instead of the other flours. This makes it gluten-free and high enough in protein to be a satisfying and filling main dish when served alongside some rice or quinoa, and maybe a side salad with plenty of crunchy lettuce.
This recipe has been made soy-free by using coconut aminos and some extra salt where soy sauce would normally be used. Soy-free chickpea or adzuki miso will also work, and if you have no problems with soy, then regular non-gmo soy tamari, shoyu or another kind of naturally fermented soy sauce can also be used.
This is a hearty and savoury dish that can be made really quickly (or the batter can be soaked overnight, for the best nutrition).
Gluten-free, soy-free, nut-free, grain-free, low fat option, under 45 minutes
Serves 2
Ingredients:
For the battered cauliflower:
1 1/2 cups chickpea flour (besan)
3/4 cup water
optional 1 teaspoon lemon juice or apple cider vinegar
1 1/2 teaspoons finely chopped garlic
1 1/2 teaspoons finely chopped ginger
2 teaspoons coconut aminos (or tamari, or naturally fermented soy sauce, or miso)
1 teaspoon finely chopped red chili
1/2 – 1 teaspoon salt (use only 1/2 teaspoon if using tamari, soy sauce or miso instead of coconut aminos)
1 small-medium cauliflower (around 500g)
olive oil, for frying
For the sauce:
optional 2-4 teaspoons sesame seeds
2-3 teaspoons toasted sesame oil or olive oil
1 medium onion, finely chopped
2 teaspoons finely chopped garlic
2 teaspoons finely chopped ginger
1-3 teaspoons finely chopped chili
1/2 cup tomato purée (passata) (to make it yourself, just put some tomatoes in a food processor and process until smooth)
2-3 tablespoons coconut aminos, miso, naturally fermented gmo-free soy sauce or tamari
2 teaspoons coconut sugar, rapadura, sucanat or jaggery
salt, to taste
2 teaspoons tapioca flour or non-gmo corn starch, mixed with 2 tablespoons water
Method:
For the best nutrition, combine the chickpea flour with 3/4 cup lukewarm water and the lemon juice and leave it to sit in a large bowl, covered, at room temperature overnight (it should be a thick batter).
Mix through the garlic, ginger, coconut aminos, chili and salt.
Gently divide the cauliflower into florets. Chop the larger ones in half if you wish. Thoroughly coat these in the batter*
The rest of this recipe comes together really quickly, so measure out and prechop all the sauce ingredients.
In a large dry saucepan, toast the sesame seeds over medium heat, shaking the pan often, until they taste toasted. Remove from the pan and set aside until later.
Put around 1cm (1/2″) olive oil in a large pan. Heat over medium-high heat. To test the heat, add a piece of the coated cauliflower, the oil should fizz up around the cauliflower right away. Fry the cauliflower in batches until golden-brown, flipping the pieces over halfway through frying. It takes 2-3 batches in a 24cm chef pan. Drain the fritters in a colander lined with a tea towel.
Alternatively, for a lower fat option, bake on greased or lined baking sheets in an oven preheated to 180c (350f) for half an hour, flipping the pieces over after 25 minutes.
When all the cauliflower has finished cooking, heat the toasted sesame oil in a large saucepan over a heat between medium-high and high. When the oil is hot, stir through the onion for two minutes, then stir through the ginger and garlic for one minute. Stir through the chili for thirty seconds, then add the tomato purée, coconut aminos and coconut sugar. Stir through until bubbling then taste, and adjust the seasonings with salt and chili (it should be fairly hot, but still edible and tasty). Keep stirring for another minute or two, to allow the sauce to reduce, then quickly stir through the tapioca flour and water mixture. Quickly add the fried cauliflower and stir to coat. Serve right away, sprinkled with toasted sesame seeds.
*if you have extra batter left over, cut an onion into half moons (or use any other chopped, fast cooking vegetable) and coat in the batter, then fry after the cauliflower has finished.
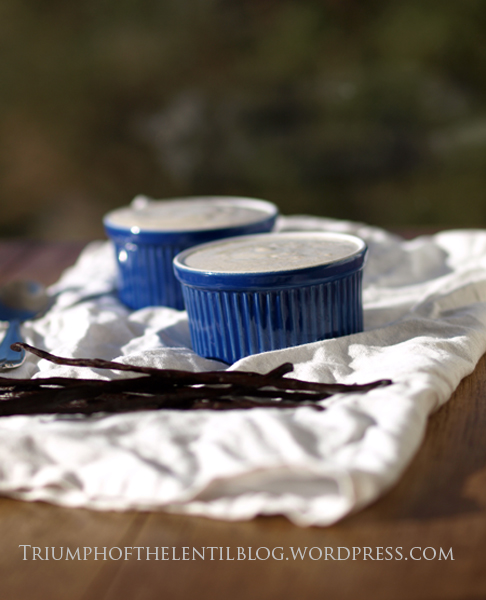
Homemade Vanilla Extract
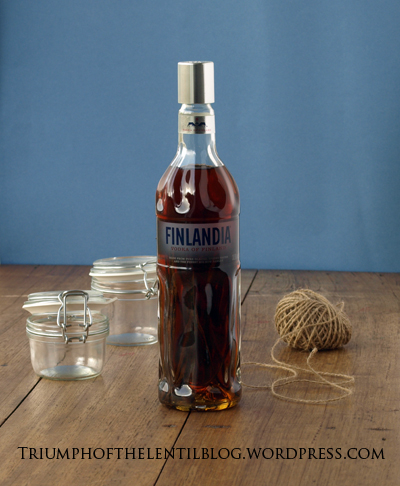
Good quality vanilla extract can be really expensive, and the shop I usually buy it from is often out of stock. But now that I know how easy it is to make at home, I’ll never buy it again. This recipe is so easy, and tastes even better than shop-bought extract.
If you buy organic vanilla beans in bulk (200g (7oz) of them is around 53 beans) it works out to be less than $5 for the vanilla beans, plus the cost of the vodka. Even using good vodka this ends up being half the price of what I used to pay for shop bought extract. (Cheap and nasty vodka will also work in this recipe).
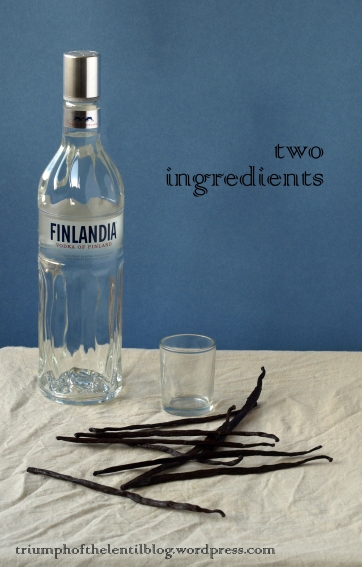
Ingredients:
Around 700ml (23oz) vodka
9 vanilla beans
Method:
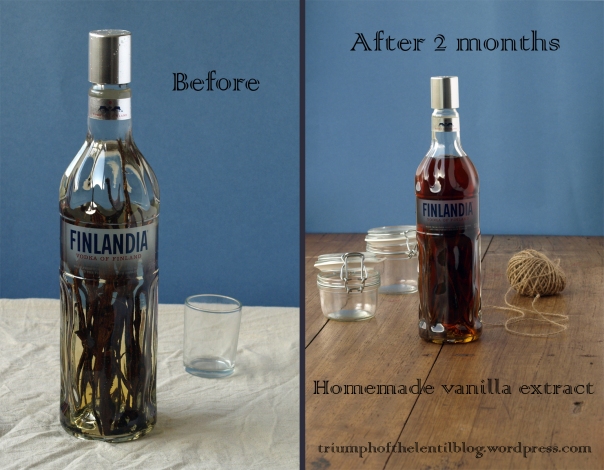
Pour a little of the vodka out (around 1 or 2 shots worth), save it for later or drink it.
Slice the vanilla beans lengthways in half. Scraping out some of the pulp and adding this to the vodka will make for a stronger vanilla extract.
Carefully place the vanilla beans and the pulp in the bottle of vodka. Put the lid on and leave it to infuse in a dark cupboard for around two months. To speed up the process turn the bottle upside down, then right side up every so often…this means you can use your extract after a month.
When the vanilla extract is ready either remove the beans and put it into smaller bottles (it makes a nice gift), or simply keep it in the vodka bottle with the vanilla beans.
Zucchini and Tomato Chutney

Most people that grow zucchinis in Tasmania seem to think the plants produce too much – I can never have enough of them – whether it’s grating them up and sneaking them into delicious chocolate mud cake, adding them to roast veggies for the last 10 minutes of roasting, grating and mixing them into a chickpea flour batter and frying as fritters, there are so many uses for them. Here is another way to use this vegetable, in a chutney that will probably keep for 12 months in the cupboard. It’s a small batch so if you’ve never made your own chutney before this is a nice one to try.
I’m growing costata romanesco zucchini this season (I think this is the third year in a row that I’ve grown it), it’s a really tasty Italian heirloom variety – so it’s GMO-free and easy to save the seeds.
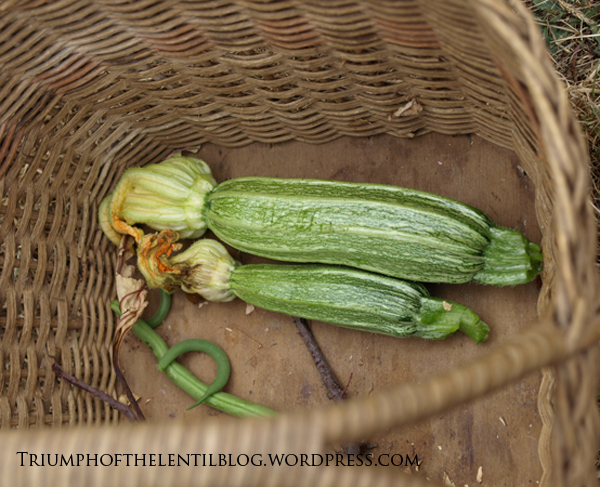
costata romanesco zucchini
Making your own chutneys and sauces is actually really easy and affordable. With shop-bought organic chutneys and relishes often being ridiculously expensive with weird stuff like xanthan gum and anonymous ‘natural flavour’ added to them it can be worthwhile to make your own, even if you don’t grow any veggies.
I based this recipe with the same amounts of fruit, sugar and vinegar as a pumpkin chutney recipe from Good Home Preserving. With the right jar preparation the pumpkin chutney recipe keeps for 12 months, so I imagine that this one will keep well too. The trick is to sterilise your jars with heat before filling, and to tip them upside down after filling until they cool down. I use this same trick for jams and sauces.
The flavourings I use in this recipe are reminiscent of a typical English chutney or relish. Feel free to change the spices, as long as the main ingredients are the same this recipe will work.
Gluten-free, soy-free, low fat, sugar-free option
Kitchen time 10-15 minutes. Cooking time 1 hour.
Makes around 1100ml/1.1 quart/4 2/3 cups)
Ingredients:
300g (10.58oz) rapadura, sucanat, coconut sugar or raw sugar
300g (10.58oz) apple cider vinegar
700g (1.54lb) zucchini, diced
1 small carrot (or extra zucchini), diced (50-100g/1.76-3.2oz)
200g (7.05oz) diced tomatoes, or tomato purée/crushed tomatoes
50g (1.76oz) sultanas or raisins
1 clove of garlic, finely chopped
125g (4.4oz) onions, diced
1 1/2 teaspoons yellow mustard powder (or yellow mustard seeds, crushed in a pestle and mortar)
1/4 teaspoon ground black pepper
1/2 teaspoon ground ginger
1/2 teaspoon turmeric
1 heaped teaspoon Himalayan salt, or natural sea salt
3 cloves, ground (or 1/4 teaspoon ground cloves)
Method:
Rinse enough jars out with very hot water (preferably boiling). Place upside down, directly on the racks of a cold oven. Heat the oven up to 120c (250f).
Combine all the ingredients in a large saucepan or stockpot over medium-low heat. Stir every now and then until the sugar is dissolved. Bring to the boil, then reduce the heat and simmer, with the lid off, for around an hour.
When the chutney has finished cooking, bring a small pot of water to the boil. Add the pot lids or gaskets and boil for 30-60 seconds, carefully remove the lids and place upside down on a clean tea towel to dry.
Carefully remove the hot jars from the oven. Fill them up with the hot chutney (I place a wide-mouthed funnel over the jars and use a soup ladle to add the chutney). Screw the jar lids on tightly and turn upside down until thoroughly cold. Turn the right way up and store in a cupboard, it will probably keep for 12 months. It will taste best after it’s been in the cupboard for a couple of weeks, but it’s still good to enjoy right away. Once the jars are opened, keep them in the fridge.
Great served with mildly flavoured seitan sausages such as pumpkin seed, lentil and herb from High Protein Vegan, or burgers such as chickpea schnitzel patties or bean and sunflower seed rissoles from ‘High Protein Vegan’, or the lentil burgers from Triumph of the Lentil.

chickpea schnitzel patties from High Protein Vegan
P.S. I have more recipes coming up on this blog soon. To ensure that you get to see them subscribe to the mailing list on the right hand side of this page to get blog posts by email – I don’t send spam, just blog posts which are not that frequent and always have a recipe or something useful in them. Facebook is making it really difficult for blog pages to get news out to people that like the page, so even if you ‘like’ the Triumph of the Lentil Blog page, you may not find out about new posts unless you follow this blog by email or Twitter.
This post is a part of Wellness Weekend, Pennywise Platter, Wheat-Free Wednesday, Made from Scratch Monday, Waste Not Want Not Wednesday,
Creamy Vanilla Bean Chia Custard
I seem to be working on quite a few different cookbooks at the moment, which may mean that it will be some time before this wonderful recipe is in print. I will be nice and share it on here now.
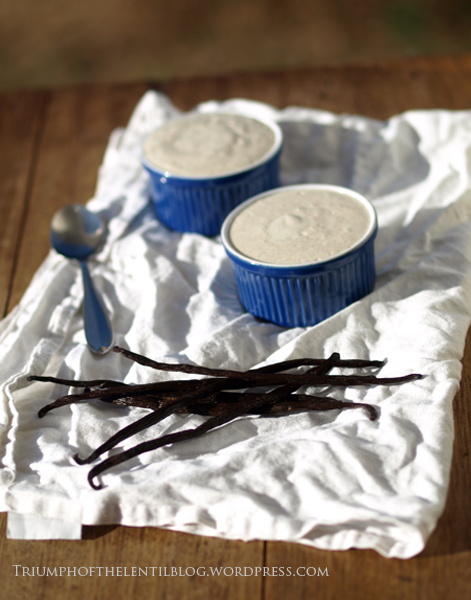
This is a healthy and filling snack or dessert with the delicious taste of real vanilla and a decadent creamy mouthfeel. It takes very little actual kitchen time – just put a couple of ingredients on to soak for a while, then add some extra ingredients and blend it up.
Gluten-free, soy-free, under 45 minutes option
Kitchen time 5 minutes
Serves 2
Ingredients:
3 tablespoons chia seeds
6 tablespoons raw cashews
1 1/2 cups vegan milk (for best results use homemade unsweetened almond, cashew or sunflower seed milk)
2 tablespoons agave syrup
pulp from one vanilla bean (or 3 teaspoons high quality real vanilla extract)
a pinch of salt
optional 1/2 teaspoon maca powder
Method:
Combine the chia seeds, cashews and vegan milk in a bowl. Cover and leave to soak in the fridge for at least 10 minutes, preferably over 2 hours or overnight.
Add this to a blender along with the agave, vanilla bean pulp, salt and optional maca powder.
Blend until smooth and enjoy right away, or refrigerate and enjoy later (it will thicken in the fridge).
This post is a part of Wellness Weekend, Healthy Vegan Fridays, Pennywise Platter, Raw Foods Thursdays, Wheat Free Wednesdays,
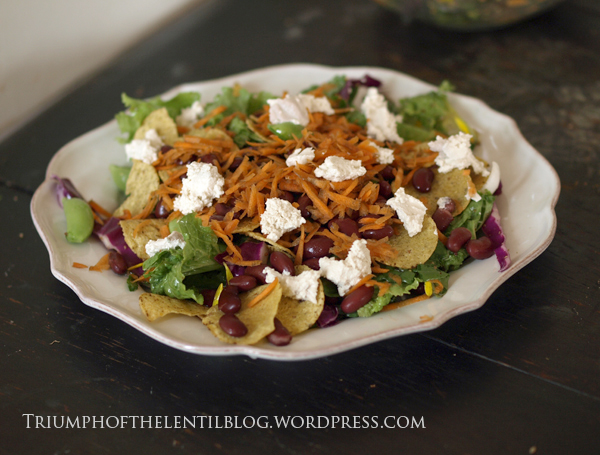
Nacho Salad
I like to eat salads for meals every now and again, typically if they have plenty of protein, fat and some carbs to make it more filling. This is a salad which has all of these things, but according to my other half it shouldn’t be called a salad, just ‘nachos’. Whatever it’s called, this is a satisfying meal that’s fast and easy to make, and perfect for hot weather.
Total time 10-15 minutes
Gluten-Free, Soy-Free, Nightshade-Free, Onion- and Garlic-Free Option, Under 45 Minutes
Serves as many as you want
Ingredients:
Dressing of your choice (for 2 adults and 2 children I use 3 tablespoons olive oil, 1 tablespoon apple cider vinegar, 1/2 tablespoon raw agave syrup, 1/2 tablespoon seeded or dijon mustard)
Leafy greens (eg. lettuce, rocket (arugula), miners lettuce, mizuna, mustard greens)
Heartier raw vegetables (eg. cabbage, kale, grated carrot, sugar snap peas, green beans)
Optional fresh herbs such as oregano and coriander leaves (cilantro)
Corn chips, or extra grated carrot
Cooked or sprouted beans
Optional extras such as avocado, vegan cheese, salsa, spring onion (green onion)
Method:
Mix the dressing in a large mixing bowl. Add the greens, veggies and herbs and toss to thoroughly coat. Put layers of the dressed salad, corn chips, beans and any extras on large plates and serve right away.
In the photo I’ve used lettuce, rocket (arugula), sugar snap peas, red cabbage, grated carrot, corn chips, cooked red kidney beans, and the basic cashew cheese from ‘Artisan Vegan Cheese’.
Magic Almost-Instant Sourdough
On a side note, the Kindle edition of my latest book is now out: UK, US, DE, FR, IT, ES, JP
This sourdough starter still takes a few days, but not nearly as long as other recipes, which typically call for feeding the sourdough for a week and throwing out a lot of the dough along the way. This is a waste-free sourdough that’s ready to use in 3 1/2 days.

Some tricks that make this sourdough extra fast:
Sourdough likes oxygen. For best results stir the mixture in between feeds to allow air into it, this will make it grow more quickly.
Rye flour. I’ve made sourdough with wheat in the past and had unpredictable and frustrating results. Rye has some special quality that makes it ideally suited for making sourdough.
I think that untreated water makes a difference. In the past I’ve used city water and the results haven’t been nearly as good. The chemicals that are dumped into mass water supplies probably aren’t great for growing wild yeast. For best results, use pure rain water or chlorine-free bottled water to establish the sourdough.
A bowl of warm water. I’ve never lived in a house that has that mythical warm rising place that most baking books seem to expect so I place the jar of starter inside a bowl, filling the bowl up with warm water to around the same level as the starter in the jar.
I use a 1.5 litre (1.5 quart) wide mouthed jar for my starter. The lid always remains unsealed, so that gasses can escape and the jar doesn’t explode. As you can see from the photo below, the starter has bubbled up and overflowed a few times after feeds – to prevent this happening, check it whenever you’re nearby and give it a stir if it looks like it’s near the top of the jar.

Day 1:
1 cup rye flour
3/4 cup cold water
Combine these ingredients in a jar or bowl. Place something over the top but do not seal, then place the jar in a bowl of warm water (not too hot, test it on your wrist to check that it’s a comfortable temperature).
Day 2 (around 24 hours later), add:
1 cup rye flour
3/4 cup cold water
Add this to the day 1 starter, and place the jar in a bowl of warm water.
Day 3, add:
2 cups rye flour
1 1/2 cups cold water
Add this to the previous days starter, then place the jar in a bowl of warm water.
In just 12 hours after day 3, the starter is ready to use.
This sourdough is really low maintenance once established. After removing 1 1/2 cups to make a batch of bread, just add 2 cups of rye flour and 1 1/2 cups of water to the starter and leave it on the kitchen counter for 24 hours to ferment. Once established it doesn’t need the bowl of warm water, and after it’s finished the 24 hours on the counter it can be kept in the fridge until the next time you bake. The trick to having a low maintenance sourdough is to just make bread with it at least once a week, that way feeding the starter can easily be done at the same time as mixing dough, and it doesn’t become an extra chore or involve any waste.

A Sourdough Bread Recipe for Baking in Loaf Pans
(suitable for Romertopf pans, and other similar-sized ones for 750g (1.65lb) loaves)
Kitchen time 5-10 minutes
Rising time around 24 hours
Baking time 1 hour
Makes 2 large loaves
I will admit that the taste of this isn’t as good as a hand shaped loaf baked on a preheated pizza stone, but lately I have been enjoying baking with ceramic loaf pans – it means I can make 2 large loaves at the same time, rather than if I hand-shaped this amount of dough it would mean having to bake the loaves separately. Hand shaped loaves baked on a preheated pizza stone will take less time to bake, just flip the loaf over after around 40 minutes, knock on the base and if it sounds hollow then it’s ready – for the best results with hand shaping, use wheat flour in stage one instead of rye flour.
If using a ceramic loaf pan, allow the bread to cool before removing from the pan. To remove the bread I slide a bread knife in completely around the loaf, pressing the loaf away from the pan as I go. I then use the bread knife as a lever to lift the loaf out of the pan. To easily clean ceramic baking pans, leave them to soak in hot water for a while.
Stage 1:
1 1/2 cups sourdough starter
1 1/2 cups cold water
2 cups rye flour
Combine all ingredients in a mixing bowl of around 7 litre (7.39 quart) capacity. Cover with a tea towel and leave to sit at room temperature for around 12 hours.
Stage 2:
4 1/2 cups cold water (use only 4 cups if using spelt flour)
3-4 teaspoons salt
9 cups wholemeal wheat or wholemeal spelt flour
Mix the water and salt into the starter dough from stage 1. Thoroughly mix through the flour. Cover with a tea towel and leave to sit at room temperature for around 12 hours.
Stage 3:
Preheat the oven to around 220c (430f).
While the oven is heating up, sprinkle the base of two large loaf pans with cornmeal or flour. Punch the dough down, knead for a few seconds, and divide into two pieces. Each piece can be completely coated in sesame seeds (or other seeds) if you wish, by covering a dinner plate in seeds, stretching the dough out into a flat circle to fit in the plate, folding the sides over into the middle, and placing this seam side down in each tin. Alternatively, just plonk the dough into the pans and sprinkle with seeds if you wish.
If your pans will fit in the sink, fill the sink partly up with warm water – the water should reach up most of the sides of the pans, but not flow into them. Leave the loaves to sit in the sink for around 20-40 minutes, until the oven has heated to 220c (430f).
Slash the top of the loaves with a knife and bake for around an hour.
Raw Caramel Slice, and an announcement

My new book is out – the first ever high protein vegan cookbook, titled ‘High Protein Vegan: Hearty Whole Food Meals, Raw Desserts and More’. It’s available now from the places listed on this page and I’d like to share one of my favourite recipes from it.
To give you an idea of what it looks like in the book:

Raw Caramel Slice
Gluten-Free, Soy-Free, Nightshade-Free, Onion- and Garlic-Free, Under 45 minutes
Kitchen time 10-15 minutes, Setting time: 30-60 minutes
A raw vegan version of an old favourite with a chewy caramel filling and thin chocolate topping, this slice is delicious and tastes a little bit like caramel nougat chocolate bars, only better. It can be made as a slice in a square pan, or as a torte in a round springform tin. For best results use almonds for the base, although walnuts or pecans will also make a great slice.
I recommend using refined coconut oil for this recipe.

Ingredients

For the base:
1 1/2 cups almonds, walnuts or pecans
a pinch of salt
4 medjool dates, pitted
1/3 cup coconut oil, liquid
For the caramel filling:
18 medjool dates, pitted
2-3 pinches of salt
1/4 cup coconut oil, liquid
1/4 cup nut butter (hazelnut, almond, cashew or brazil nut)
For the chocolate topping:
1/4 cup coconut oil, liquid
a pinch of salt
2-3 tablespoons raw agave syrup
1/2 cup cacao or cocoa powder
Method
To make the base, process the almonds and salt in a food processor until crumbly, but not too fine (some will resemble almond meal, and some will be more like the nut pieces that go into pesto). Add the dates and process until no large pieces remain. Process through the coconut oil until evenly mixed in. Press the mixture into a greased or lined 20cm (8”) square or round baking tray.
To make the caramel layer, process the dates and salt in a food processor until it is finely ground and forms a ball. Add the coconut oil and nut butter and continue to process until thoroughly mixed through (you may need to stop the processor and break up the ball with a fork a couple of times). Press this mixture into an even layer on top of the base.
Prepare the chocolate topping by combining the coconut oil, salt and agave in a bowl. Stir through the cacao and mix until evenly combined, adding more agave if you like. Spread this on top of the caramel layer (you may need to use your hands to spread it) and allow to set at room temperature for at least half an hour before slicing, or until the chocolate topping has set.
What to expect from ‘High Protein Vegan’:
•Innovative ways to serve legumes and vegetables
•Better photos: since writing my first book I’ve learned more about working with natural light and put extra effort into composition and styling, along with upgrading my lens. All the photos in this book are taken with natural lighting.
•Vegan sausages! Bratwurst, Kransky, Frankfurter and more…
•Soy-free tofu, and recipes to use it in
•Raw desserts and raw meals, all without a dehydrator
•All the answers you’ll need for when people ask “where do you get your protein?”
•Recipes to impress anyone, for a variety of occasions
Similar to ‘Triumph of the Lentil’, this book also has:
•Minimal premade products – recipes totally from scratch including laksa and Thai green curry – make meals easily from fresh ingredients, with a taste that is superior to using shop-bought pastes.
•Soy-free options for all recipes. While the book itself is not soy-free in that it doesn’t specify to use soy-free miso or soy-free vegan milks, the soy allergy of my main taste-tester means that all the recipes have been made using soy-free ingredients.
•Mostly gluten-free recipes
•Cook-friendly, frustration-free layout – I like to cook from cookbooks and designed this one with how I want a cookbook to be – easily readable recipes from a distance, with the ingredients and instructions on the same page.
•Colour photos with nearly every recipe
•Whole foods – no refined grains, margarines or ‘fake’ things in sight.
•Index by ingredient – make use of seasonal vegetables and whatever cooked legumes you have on hand
•Recipes suitable for small households – many recipes make 2 servings, while all other recipes make more servings that reheat well or can be stored uncooked in the fridge for cooking up later.
•Lots of everyday recipes – these were all tested with two young children to look after and mostly with ingredients that I can find locally though the whole year. I don’t have the time to spend hours in the kitchen for every meal and have timed every recipe to show just how little hands-on kitchen time some of them take.
•Real meal recipes – This is the stuff I cook at home – not a bunch of appetisers, fancy breakfasts and complicated side dishes but mostly hearty recipes that are either meals on their own, or completed with a very simple side dish.
For more information about the book, see http://highproteinvegan.wordpress.com/
This post has been shared with Allergy-Free Wednesday, Wheat-Free Wednesday, Whole Food Wednesday, Pennywise Platter, Wellness Weekend, Raw Foods Thursdays and Healthy Vegan Fridays
Soy-Free Tofu
When I’m working on books I never really know what recipes to share on the blog, and what can wait for the book. This is something I knew I had to share right away.

It’s not the same as soy tofu – it doesn’t have the same texture or taste, but it is a protein-rich medium for all kinds of delicious sauces (like chermoula, pictured above), or to be fried up and used in a variety of recipes, like the grain-free pad thai from my next book, pictured below.

It can also be cut into chip shapes, shallow fried and enjoyed as a high-protein alternative to potato chips, to turn a chip sandwich into a balanced meal.

I’ve based my recipe around a combination of things – Burmese tofu has been traditionally made with chickpea flour for a long time, but typically involves a lot of prep time and tricky steps, and while this would reduce the phytic acid in the tofu, it makes the process a lot slower. With my recipe the tofu can be ready to use in under 45 minutes. If you’re good with planning ahead and want to make the tofu as nutritious as possible then the batter can definitely be soaked for 8 hours or more before heating it up, otherwise enjoy this cheap, fast and tasty homemade alternative to tofu.
Soy-free, gluten-free, nut-free, low fat, nightshade-free, onion- and garlic-free, under 45 minutes
Makes 4-6 serves
Ingredients:
2 1/2 cups chickpea flour (besan)
1 teaspoon salt
4 cups cold water
Method:
Line or grease a 20x30cm (8×12″) pan.
In a heavy-bottomed chef’s pan, frying pan or saucepan place the chickpea flour and salt, and squash out any lumps. Add water a little at a time, making sure that no lumps form.
Turn on the heat to medium and stir continuously until very thick. I make this on an electric stove in a 9 1/2″ (24cm) chef’s pan and it takes around 7 minutes. If you’re using a gas stove it will be quicker, if you’re using a smaller saucepan it will take longer.
As soon as the mixture is very thick, quickly spread it into the prepared pan, pressing to form a flat, even surface (it will set very quickly). Leave to set for at least half an hour before using as tofu.
To remove from the pan first slice into whatever shape you want them to be, and gently lift up. I find that lining the pan with a silicon baking mat or some baking paper makes it a lot easier to remove.
This will keep in the fridge for up to a week and can be used in all kinds of recipes that call for tofu.

Satay Soy-Free Tofu
This post has been shared on Pennywise Platter, Wellness Weekend, Whole Food FridaysandHealthy Vegan Fridays